Ok so first for my pattern fail (I told you I’d be sharing more of them)
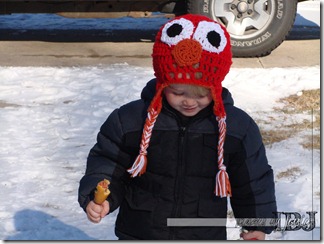
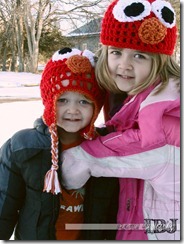
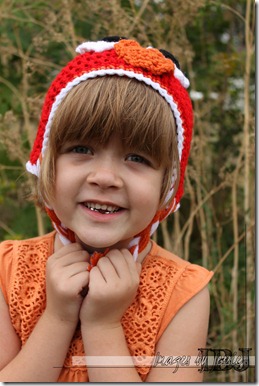
This first time I made this hat for my son, I had NO idea what decreasing was so when I wanted less stitches, I just skipped a stitch and left behind a HUGE HOLE in my project. The first and second photo show the fail :( Oh how embarassing. The hat on the left (my taller kid is wearing it) was my first success. Her’s has holes too but those holes were intentional :) If you like that look, add a chain 1 between each of your DC. It will make the hat more airy and light.
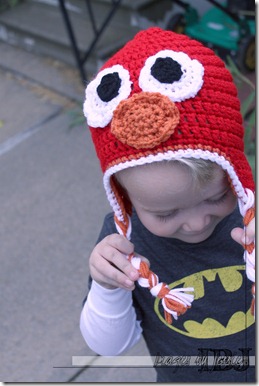
This hat is the new and improved hat, no mistakes here… at least I hope not :)
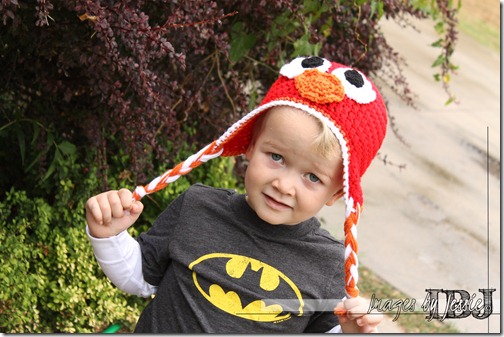
OK so I think we all know who this little monster is supposed to be :)
This hat is the reason my son had NO interest in his puppy hat after only one day. I kind of think he likes his blue train hat more but this one was his favorite for well over a year before he moved on to the train.
This pattern IS mine :)
and I’m sharing it with all of you for free!
For this hat I used Red Heart Yarn. Size 4, medium weight in Red, black, white and Orange.
Hook size I/9 – 5.50 mm
Hat pattern
With Red yarn, chain 5 and slip stitch together to form a circle
Row 1: Chain 2 (counts as first DC now and throughout the rest of pattern) DC in same stitch. 2 DC in each stitch around. Slip stitch into chain 2 to end row (this is how you will finish all rows) (10 stitches)
Row 2: Repeat Row 1 (20 stitches)
Row 3: Chain 2. DC in same stitch. 1 DC in next stitch, 2 DC in next stitch. Repeat pattern 2 –1 –2 –1 around. (30 stitches)
Row 4: Chain 2. DC in same stitch. 1 DC in next 2 stitches, 2DC in next. Repeat pattern 2 –1 –1 –2 –1 –1 around. (40 stitches)
Row 5: Repeat Row 4 (52 stitches)
Row 6 Chain 2. DC in next stitch. Repeat 1 DC in each stitch around. (52 stitches)
Row 7 – 12: Repeat Row 6
If you want a beanie
Row 13: With White yarn, chain 1. SC in each stitch around. Finish off and weave in ends.
If doing earflaps
I am weird. I make my earflaps right on the hat so I don’t have to sew them on later. If you prefer, you can make them separately.
Row 13: (still using red yarn) chain 1. SC 12 stitches (1 in each stitch)
Chain 1, DC 8 stitches, chain 2, turn
Skip first DC, DC 7, chain 2, turn
Skip first DC, DC 6, slipstitch down ear toward front of hat.
SC 18 (1 in each stitch)
Chain 1, DC 8 stitches, chain 2, turn
Skip first DC, DC 7, chain 2, turn
Skip first DC, DC 6, slipstitch down ear toward back of hat.
SC in remaining stitches. Slipstitch ends together
Row 14: Using White Yarn, SC 1 stitch in each stitch around. Slipstitch ends together.
Row 15: Using Orange Yarn, SC 1 stitch in each stitch around. Finish off and weave in all of he ends.
Braids
Cut several strands of each color (White, and Orange) Make them all the same length, mine were about 22 inches. Mix up the colors and braid 1 half of the strands through the bottom of 1 earflap and the other half of the strands through the bottom of the other earflap.
Eyes – Make 2 of each part
White part:
Using white, chain 4 and slipstitch into a circle.
Row 1: SC 10 stitches into circle. Slipstitch end into first SC.
Row 2: SC 20 around (2 in each stitch) Slipstitch end into first SC.
Row 3: SC 40 around (2 in each stitch) Slipstitch end into first SC.
Pupils:
Using black, chain 4 and slip stich into a circle. SC 10 stitches into circle and slipstitch ends. Sew onto white parts and sew eyes into place on hat.
Nose:
Using Orange Yarn, follow same pattern to make the white part of the eyes. Sew into place on hat.
Weave in any leftover ends and you are done.
Please leave a comment and let me know if there are any mistakes or if you found a problem with the pattern.
My patterns are for personal use only please don’t sell anything you make from them.






.JPG)
.JPG)
